前言
这篇我们继续研究InputNumber。
基本实现
基本的准备工作过后,开始基本实现。
上测试代码:
<el-input-number v-model="num" @change="handleChange" :min="1" :max="10" label="描述文字">
</el-input-number>
上组件代码:
<template>
 <div
 :class="[
  'el-input-number',
 ]"
 >
 <span
  class="el-input-number__decrease"
  role="button"
  :class="{'is-disabled': minDisabled}"
  @click="decrease"
 >
  <i class="el-icon-minus"></i>
 </span>
 <span
  class="el-input-number__increase"
  role="button"
  :class="{'is-disabled': maxDisabled}"
  @click="increase"
 >
  <i class="el-icon-plus"></i>
 </span>
 <el-input
  ref="input"
  :value="value"
  @input="value => $emit('input', value)"
 >
 </el-input>
 </div>
</template>

<script>
import ElInput from '../Input/index'

export default {
 name: 'ElInputNumber',
 props: {
 value: {},
 max: {
  type: Number,
  default: Infinity
 },
 min: {
  type: Number,
  default: -Infinity
 },
 },
 computed: {
 minDisabled() {
  return this.value - 1 < this.min;
 },
 maxDisabled() {
  return this.value + 1 > this.max;
 },
 },
 methods: {
 decrease() {
  if(this.minDisabled) return

  this.$emit('input', this.value - 1)
 },
 increase() {
  if(this.maxDisabled) return

  this.$emit('input', this.value + 1)
 }
 },
 components: {
 ElInput
 }
}
</script>
上效果:
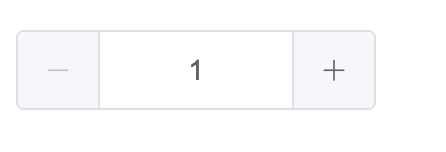
这次可以复用Input组件,两边加新增/减少两个按钮,实现加减逻辑。再控制最大值最小值的时候,禁用按钮,基本实现完成。
点击按钮持续增加/减少
现在添加:点击加减按钮的时候,不抬起鼠标,值就会持续增加/减少的特性。
要实现此功能,源码中用到了directive自定义指令,靠节流mousedown事件来实现持续点击效果。
写自定义命令:
import { once, on } from '../utils/dom';

export default {
 bind(el, binding, vnode) {
 let interval = null;
 let startTime;
 // binding.expression 就是decrease/increase 事件名称
 // handler就是对应的相应函数
 const handler = () => vnode.context[binding.expression].apply();
 const clear = () => {
  if (Date.now() - startTime < 100) {
  handler();
  }
  clearInterval(interval);
  interval = null;
 };

 on(el, 'mousedown', (e) => {
  if (e.button !== 0) return;
  startTime = Date.now();
  once(document, 'mouseup', clear);
  clearInterval(interval);
  // 实现节流
  interval = setInterval(handler, 100);
 });
 }
};
在组件中使用自定义命令:
import RepeatClick from '../../directives/repeat-click';

directives: {
 repeatClick: RepeatClick
},

<span
 class="el-input-number__decrease"
 role="button"
 :class="{'is-disabled': minDisabled}"
 v-repeat-click="decrease"
>
 <i class="el-icon-minus"></i>
</span>
<span
 class="el-input-number__increase"
 role="button"
 :class="{'is-disabled': maxDisabled}"
 v-repeat-click="increase"
>
 <i class="el-icon-plus"></i>
</span>
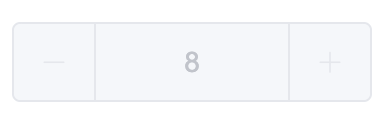
禁用状态
- 添加 { 'is-disabled': disabled } 到根节点样式上。
- 添加:disabled="disabled"到el-input节点上。
- 添加if(this.disabled) return 到decrease/increase方法上。
完成效果:
步数
上测试代码:
<el-input-number v-model="num" :step="2"></el-input-number>
给组件添加step属性。在组件中把+/-1这样到代码替换为+/- this.step。
严格步数
step-strictly属性接受一个Boolean。如果这个属性被设置为true,则只能输入步数的倍数。
上测试代码:
<el-input-number v-model="num" :step="2" step-strictly></el-input-number>
要想实现严格步数,我们直接输入的值,会检查是不是step的倍数,如果不是,则换成step的倍数。这就不能直接把InputNumber的value直接绑定在内部的el-input上了。先在el-input的input事件记录输入的值。再在change事件中将值赋予给value,最后在watch.value上校验输入的值,并转换成step的倍数。
data() {
 return {
 currentValue: 0, // 缓存上次输入的值
 userInput: null, // 缓存当前输入的值
 };
},

<el-input
 ref="input"
 :disabled="disabled"
 :value="currentValue" // 变为绑定currentValue
 @input="handleInput"
 @change="handleInputChange"
>
</el-input>

// 先在el-input的input事件记录输入的值
handleInput(value) {
 this.userInput = value;
},
// 在change事件中将值赋予给value
handleInputChange(value) {
 let newVal = value === '' ? undefined : Number(value);

 if (!isNaN(newVal) || value === '') {
  this.setCurrentValue(newVal);
 }
 this.userInput = null;
},
setCurrentValue(newVal) {
 const oldVal = this.currentValue;

 if (newVal >= this.max) newVal = this.max;
 if (newVal <= this.min) newVal = this.min;
 if (oldVal === newVal) return;
 this.userInput = null;
 this.$emit('input', newVal);
 this.$emit('change', newVal, oldVal);
 this.currentValue = newVal;
},

watch: {
 // 在watch.value上校验输入的值,并转换成step的倍数
 value: {
 immediate: true,
 handler(value) {
  let newVal = value === undefined ? value : Number(value);

  // 设置严格步数的逻辑
  if (this.stepStrictly) {
   newVal = Math.round(newVal / this.step) * this.step
  }

  if (newVal >= this.max) newVal = this.max;
  if (newVal <= this.min) newVal = this.min;

  this.currentValue = newVal;
  this.userInput = null;
  this.$emit('input', newVal);
 }
 }
},
精度
上测试代码:
<el-input-number v-model="numPrecision" :precision="2" :step="0.1" :max="10"></el-input-number>
这里step变成小数了,那在累加得过程中,就会有0.1+0.2这样得精度问题出现了。element的解决思路是将值扩大精度倍进行计算,得到结果后再除以精度倍数。
increase() {
 if(this.maxDisabled || this.disabled) return
 const value = this.value || 0;
 const newVal = this._increase(value, this.step);

 this.setCurrentValue(newVal);
},
_increase(val, step) {
 if (typeof val !== 'number' && val !== undefined) return this.currentValue;
 // step是0.1,precisionFactor是10。
 const precisionFactor = Math.pow(10, this.numPrecision);

 return this.toPrecision((precisionFactor * val + precisionFactor * step) / precisionFactor);
},

// 确保计算得结果0.10000000001这种误差情况会被消除
 toPrecision(num, precision) {
 if (precision === undefined) precision = this.numPrecision;
 return parseFloat(Math.round(num * Math.pow(10, precision)) / Math.pow(10, precision));
},
在展示的时候,利用toFixed函数展示精度即可。
效果如下:

尺寸
添加size属性,在根元素得样式添加size ? 'el-input-number--' + size : ''。
效果如下:

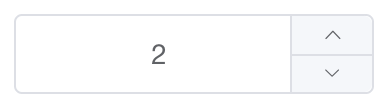
按钮位置
设置 controls-position 属性可以控制按钮位置。
上测试代码:
<el-input-number v-model="num" controls-position="right" @change="handleChange" :min="1" :max="10">
</el-input-number>
通过controls-position='right',在组件内控制样式即可。
效果如下:
总结
严格步数和精度这两个特性得逻辑稍有些复杂,需要多研究一会。
源码在码云: https://gitee.com/DaBuChen/my-element-ui/tree/input-number
到此这篇关于Element InputNumber 计数器的实现示例的文章就介绍到这了,更多相关Element InputNumber 计数器内容请搜索悠悠之家以前的文章或继续浏览下面的相关文章希望大家以后多多支持悠悠之家!
发表评论 取消回复